3. Beauty is more than skin deep

Kunstwerkplaats Meisje

We’re used to seeing images of the Girl with a Pearl Earring in books, posters, online – and recently, on the packaging for ice cream bars.

There is a reason why visitors flock from all over the world to see the real painting. Seeing The Girl in person, you become captivated by her presence, drawn in in by her gaze, the way her earring shines against the darkness of her neck, how Vermeer managed to capture a moment in light and time. No matter how accurate a reproduction is, there is a certain something that only Vermeer was able to paint…something almost magical. Embarking on a new technological exploration of this masterpiece is a humbling experience. To work with and examine The Girl unframed and off the wall really gives us with the sense she is truly a 3-dimensional object and not simply a 2-dimensional image on a page. Each layer of paint adds a layer of depth and each layer has a purpose, adding something to the final image.

The Girl with a Pearl Earring - like most 17th-century paintings – is made up of different layers: materials applied in sequence, one on top of the other. In future blog entries, I’ll talk about each layer one at a time: the canvas, ground, paint layers, glazes and varnish.

During our technical examination in front of the public, we will find out about the layers at and beneath the surface of The Girl using non-invasive imaging techniques that do not touch the painting. Despite having these methods at our disposal, we can learn more by examining samples as well.

3A New Meisje Onderzoek
Schematic diagram of a canvas painting. Diagram by Moorea Hall-Aquitania.

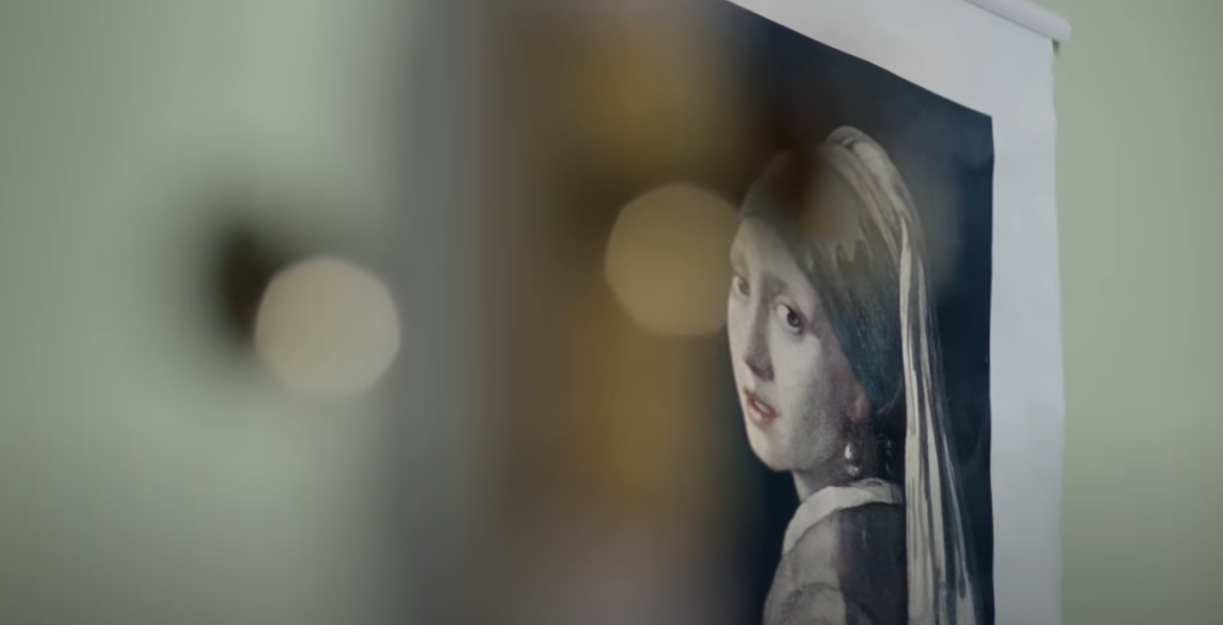
Just a little pinprick

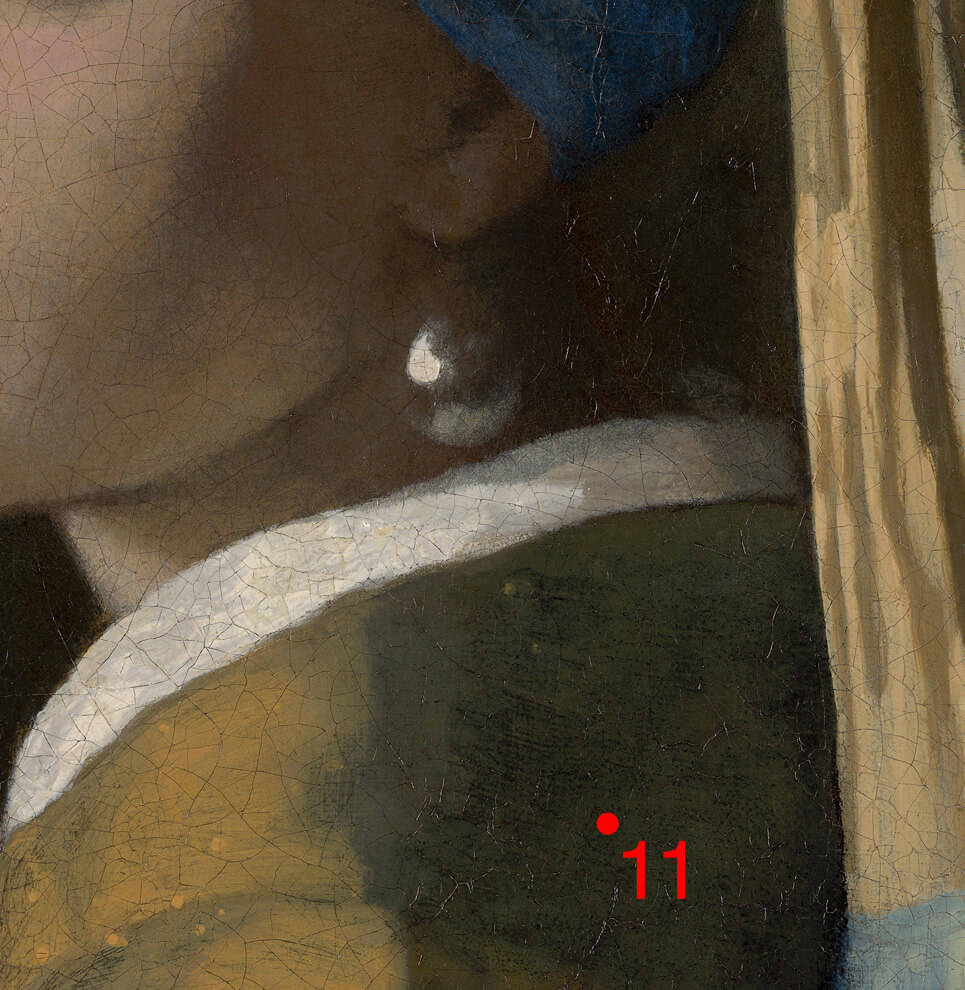
A sample is a minuscule fragment taken from the painting to better understand its material composition and/or layer build-up. First, the conservator, or conservation scientist, selects a suitable sample site under the microscope: at the edge of an existing damage, or in an inconspicuous spot on the painting. Then using a sharp scalpel (under the microscope), they remove a tiny fragment that includes all of the relevant layers.

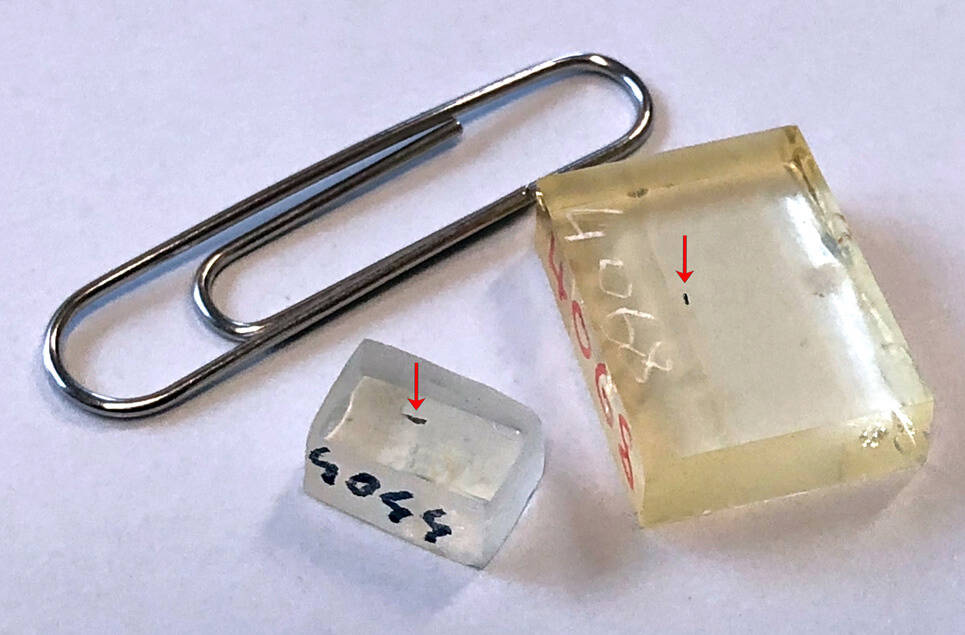
From this tiny sample – smaller than the full stop at the end of this sentence – we can obtain an enormous amount of information. Still, we try to avoid removing material from the painting unnecessarily. Fortunately, conservators in 1994 only needed to take a few samples from the Girl with a Pearl Earring. As I’ll explain in a blog in a couple of days, loose fragments became detached from the painting more than 100 years ago and got stuck on the surface. These were carefully removed, and saved for further scientific analysis.

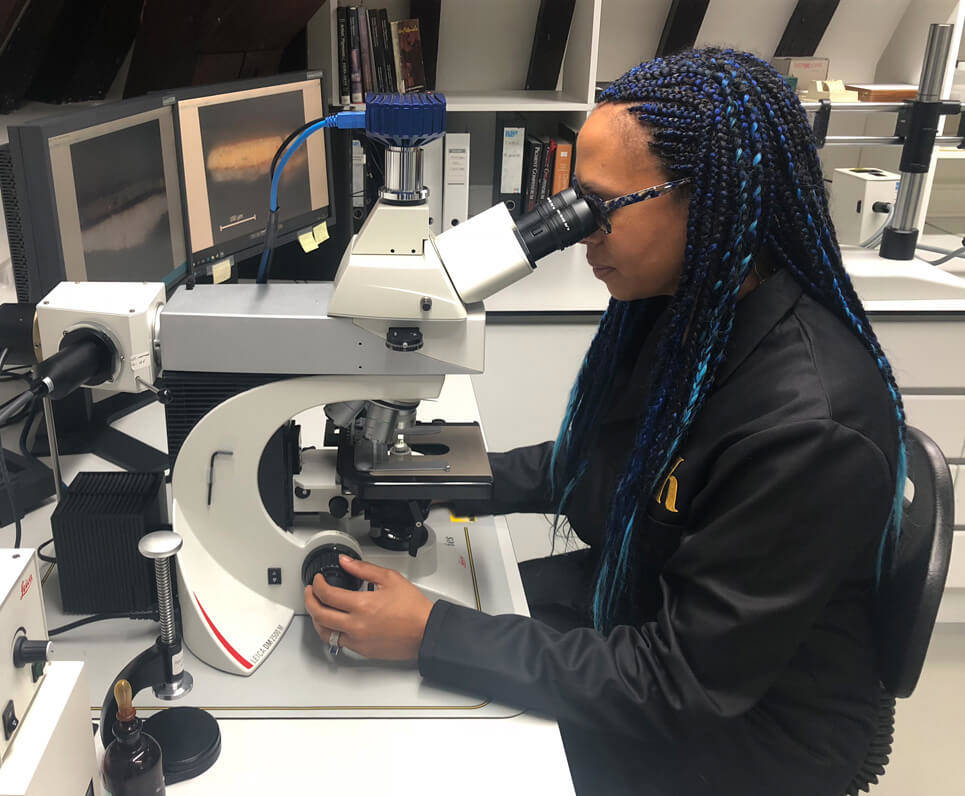
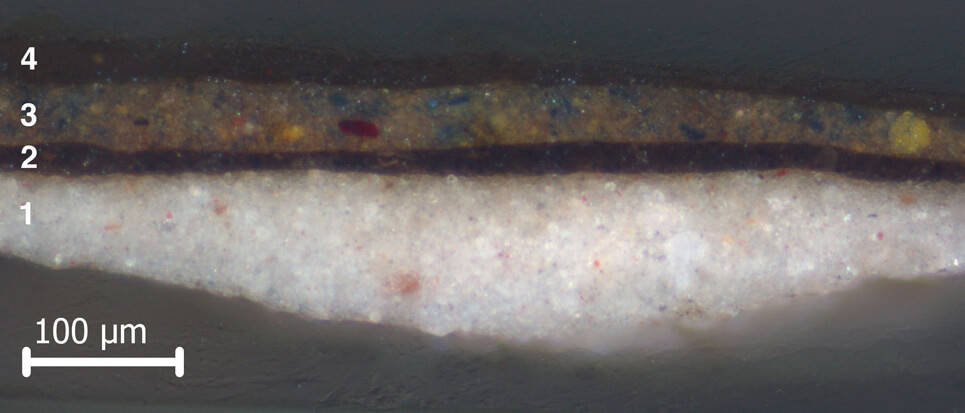
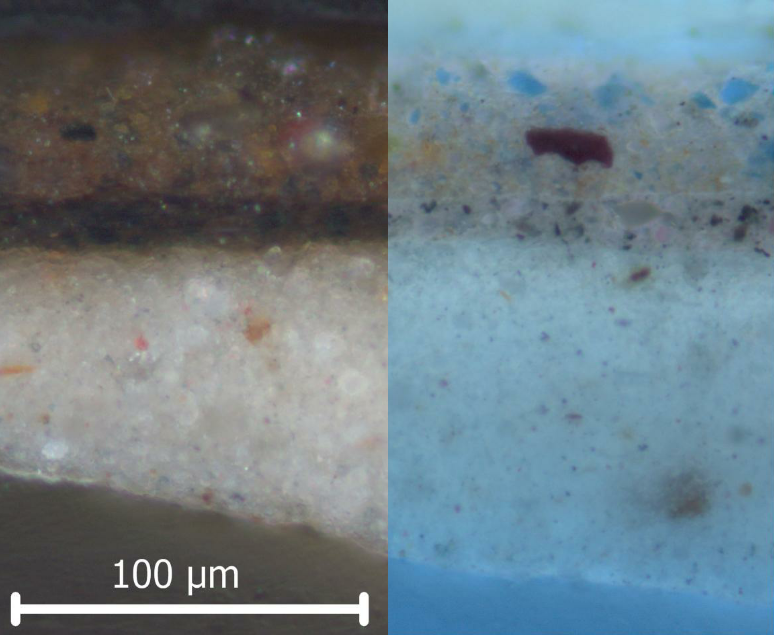
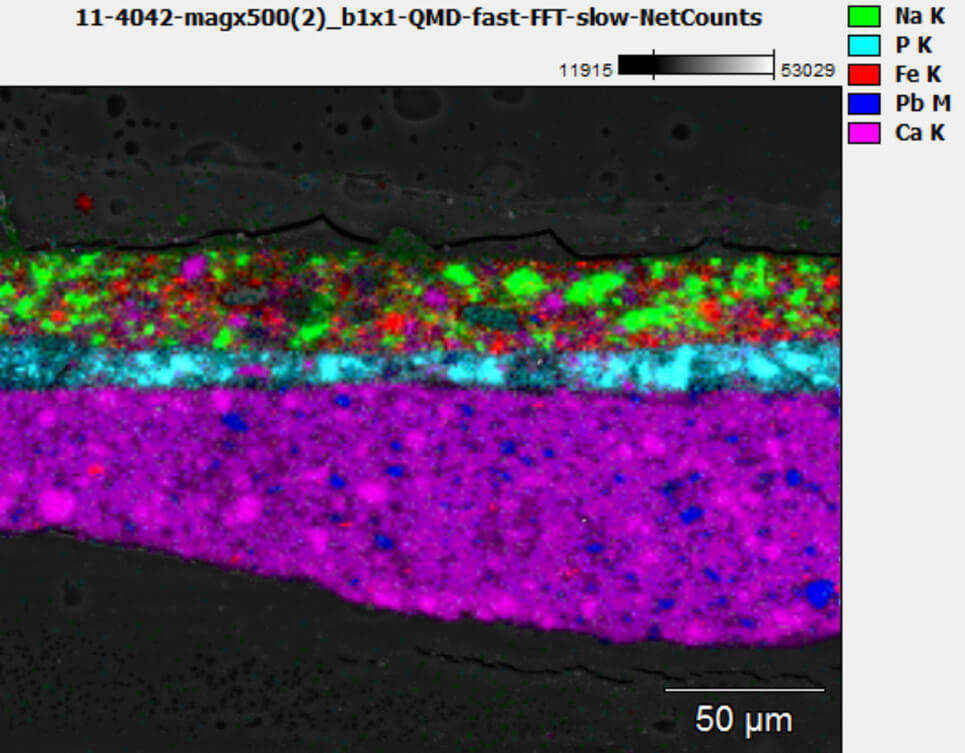
A sample can also be turned into a cross-section to find out about the layer structure of the painting. To make a cross-section, the conservator embeds each sample inside a block of transparent resin. Then they polish the resin block to expose the side of the sample, which reveals all of the layers stacked on top of each other, like a sandwich or a lasagne. They examine the polished surface under a microscope, at magnifications of about 200, 400 or 1000 times larger than what you see with your eye.

3B Samples In Blocks With Toothpicks Meisje Onderzoek
Cross-sections embedded in resin (next to a paper clip for scale). These samples were embedded in 1994 and are still useful for analysis today.
3C Meisje Met De Parel Onderzoek Sample Site 11 TEMP
Sample site for sample 11/4042, next to an existing damage
3D Meisje Met De Parel Onderzoek Abbie Looking Through Microscope
Abbie examining the sample under the microscope. Photo: Ivo Hoekstra.

Here I’ll show you one example: Sample 11. The sample site is from The Girl’s shoulder, next to an existing damage. The sample was embedded as a cross-section, and examined under the microscope.

3E Meisje Met De Parel Onderzoek Icn1687x11 Bf200x Numbered
At 200x magnification, the whole sample is visible, and the layers from the bottom to the top are: (1) the ground, (2) a dark brown underlayer, (3) the yellow upper paint layer, and (4) varnish layers applied during past restoration treatments.
3Fg New Meisje Met De Parel Onderzoek
Left: Bright field illumination, 400x magnification / Right: Ultraviolet (UV) fluorescence, 400x magnification. Registration and curtain viewer: Rob Erdmann.

By looking at the shape, colour and fluorescence of the individual pigment particles, we can identify some of the pigments and other materials. (I will go into more detail about Vermeer’s pigments, and the build-up of The Girl’s clothing in later blog entries). But if we want to identify materials with more accuracy, or find out about their chemical composition, we can also use scientific analysis.

Scientific analysis

Samples can be examined using high-tech analytical techniques to find out more about the materials. SEM-EDX is a technique that allows us to identify the chemical elements that make up the pigments: for instance, sodium (Na), phosphorus (P), iron (Fe), lead (Pb) and calcium (Ca).

3H SEM Map Of Sample 11 Shell Meisje Met De Parel Onderzoek
SEM-EDX map of elements in Sample 11/4042. Analysis by Ralph Haswell, Shell Technology Centre Amsterdam.

Fragments that are not embedded in resin can also be analysed. For example: GC-MS can be used to identify the type of oil that Vermeer used, and UHPLC can help identify the type of red organic material that was used to paint the skin.

The analysis carried out in the 1990s at the Cultural Heritage Agency of the Netherlands (RCE) and FOM/AMOLF was state-of-the-art at the time, but think of how far technology has come since then.

3I Vermeer Illiuminated VHS Meisje Met De Parel Onderzoek
VHS cassette tape of Vermeer Illuminated (1994)

Using new technologies over the last year, we have re-analysed these sample to find out about the materials that Vermeer used, and how they have changed over time. We are thrilled to have scientists and chemists from the RCE participating in The Girl in the Spotlight, as well as specialists from other institutions, including Shell Technology Centre Amsterdam and Maastricht University.

The findings we’ve made from the samples will complement the non-invasive imaging to give us a more complete understanding of the Girl with a Pearl Earring, and what lies beneath the surface.

Acknowledgements

  • Samples (1994): Jørgen Wadum, Mauritshuis.
  • Technical research and scientific analysis (1994-96): Karin M. Groen; Netherlands Institute for Cultural Heritage (now Cultural Heritage Agency of the Netherlands (RCE)); Jaap Boon, Inez D. van der Werf, Klaas Jan van den Berg (FOM Institute for Atomic and Molecular Phyisics (AMOLF)); DSM-Research.
  • Examination and photography of cross-sections: Annelies van Loon and Petria Noble, Mauritshuis / Rijksmuseum
  • SEM-EDX: Annelies van Loon, Mauritshuis/Rijksmuseum; Ralph Haswell, Shell Technology Centre Amsterdam
  • SIMS: Anne Bruinen and Ron Heeren, Maastricht University
  • Scientific analysis (2016-17): Klaas Jan van den Berg, Art Ness Proaño Gaibor, Henk van Keulen, Suzan de Groot; Cultural Heritage Agency of the Netherlands (RCE)